In week 10, we have made a great progress on our object and also received several useful feedbacks from the tutors. After that, we have made a couple changes for our final installation.
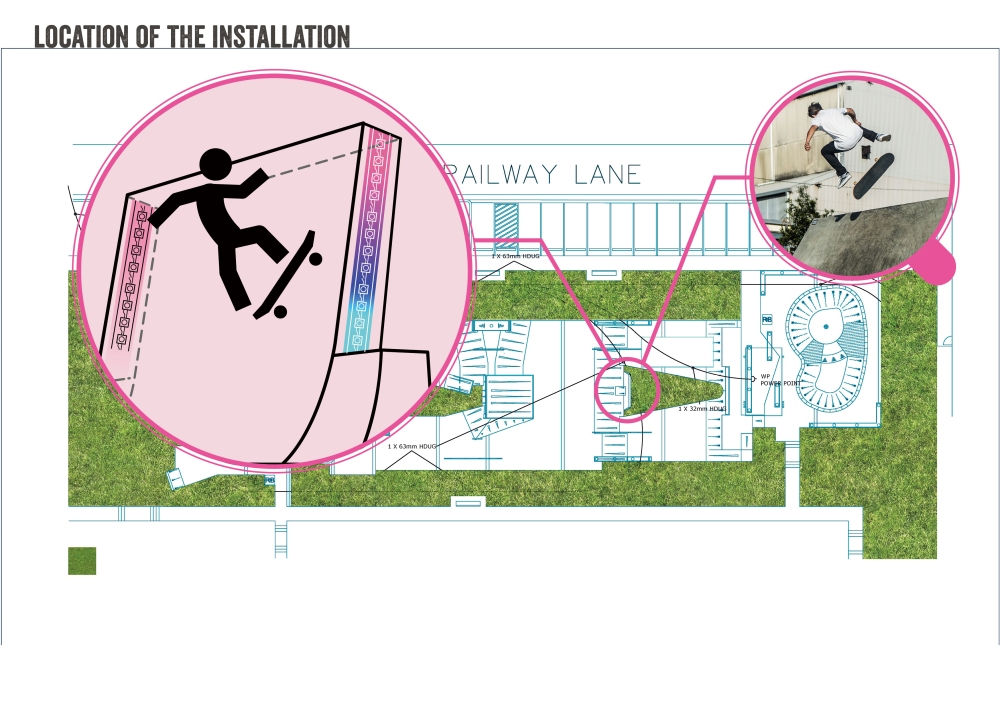 We were focusing on the 3M High Wall of the Skatepark. First of all, for our previous concept, we were going to use five illuminative modules to mark the height level which skateboarders achieve. Nevertheless, after the research, we didn’t found a suitable lighting module that we could use. After talking to Lian in the Friday’s tutorial, we knew that the LED strips could also achieve that effects. Hence, we decided to use four LED strips to stick them on both sides of the High Wall.
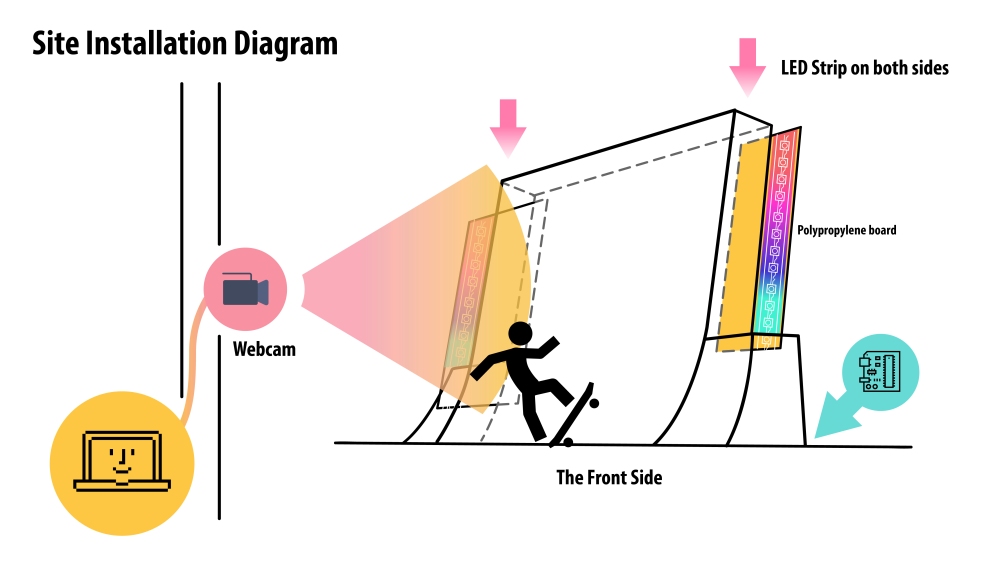
For the Site Installation Diagram, we will hold the webcam on the pole which near the high wall, so it can detect the movement of the skateboarders. And also the webcam has to connect to the laptop so it can transfer data. The laptop will plug into a power point as it will continue open for three hours during the Sk.8 event.
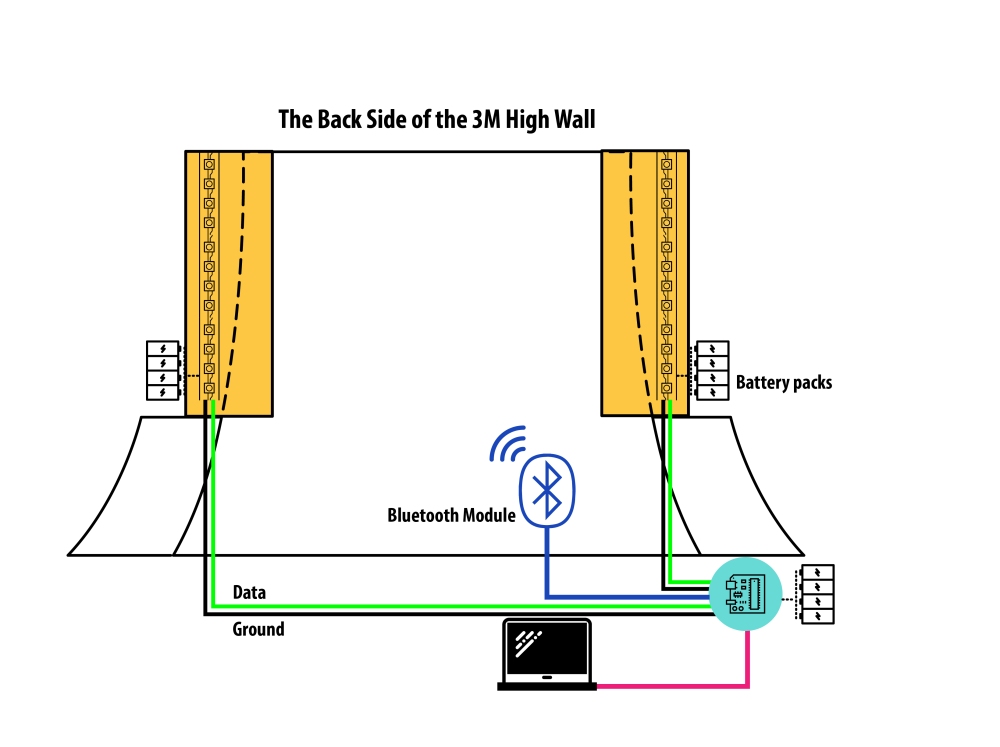 We will stick the LED strips on both sides of the high wall. They will be connecting with one Arduino board. We also separate five colours of the LED strip on each side. Each colour can represent one level of height that the skaters achieve. Next step, we need to play around with the values to achieve a better effect. The Arduino board and cables will be hidden on the back of the high wall. Furthermore, we have to consider the weather condition. Since if it’s raining during the event, we would make sure all the equipment can be quickly removed and pack up.
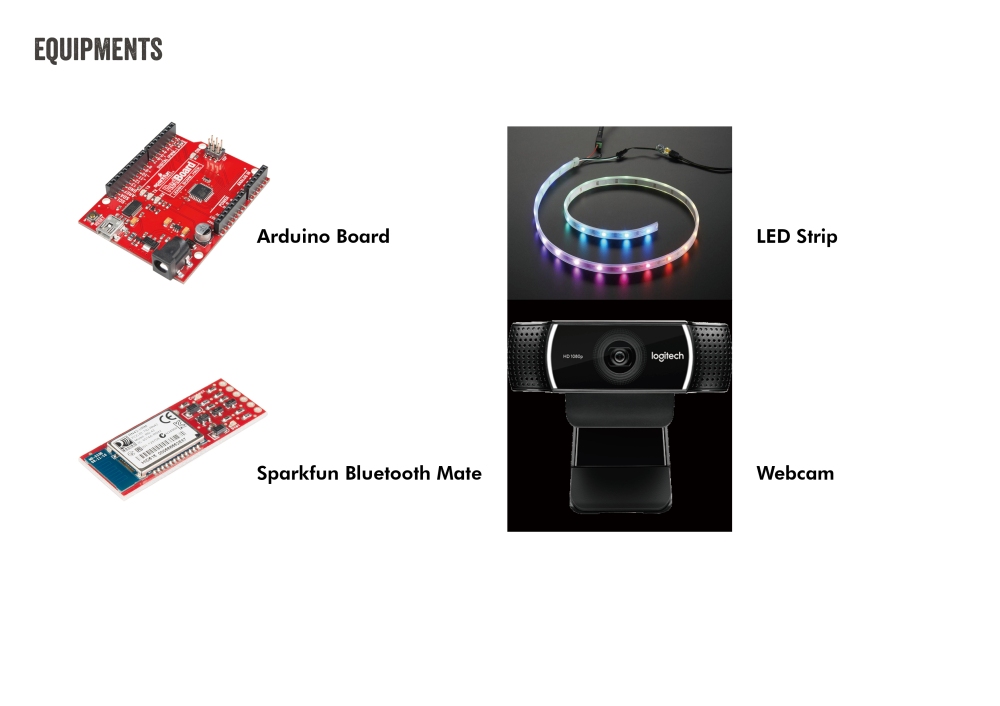 The sensors and equipment we are going to use include:
- Arduino board
- Sparkfun Bluetooth Mate
- LED Strips
- Webcam
- Laptop
